Making the Kantele
I'm making a five string hollowed out, one piece kantele with a tailpiece because it seems more traditional to me. Also, it's a good method for someone like me who doesn't have access to a full workshop and lots of tools!
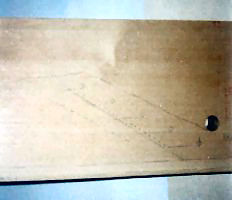
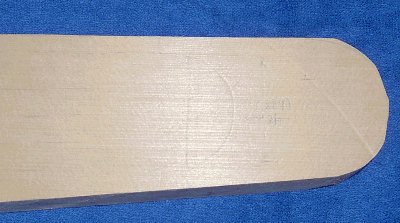
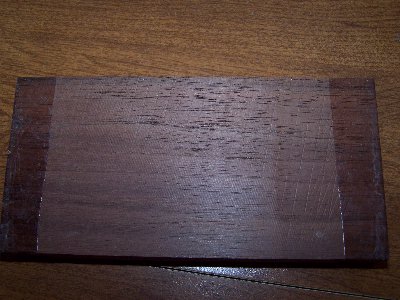
Week of October 24, 2004: I began making my kantele by tracing the outline of the kantele from the plan using a #2 pencil. I could only get 8 1/2" x 11" tracing paper so I taped several sheets together. After I traced it, I turned the paper over and traced over the tracing. I then took this second tracing and placed it on the wood. I thought I would be able to just rub the paper and transfer the outline to the wood, but that didn't work. I'm using a very hard wood. I had to trace over the tracing yet again, bearing down as hard as I could in order to get the pencil to transfer to the wood. Even so, in a few places, I ended up lightly drawing on the wood itself because I just couldn't get the plan to transfer onto the wood. Not really understanding what, exactly, I was going to do with the transfer, I traced everything - even the lines for the strings!
November 14, 2004: I brought my wood up to my brother's house so I could use his bench drill. Phil was supposed to be working on some plumbing that day, but when he saw what I was doing, he said it looked more interesting so he stayed to watch and help.
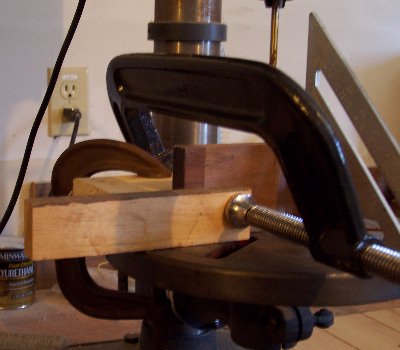
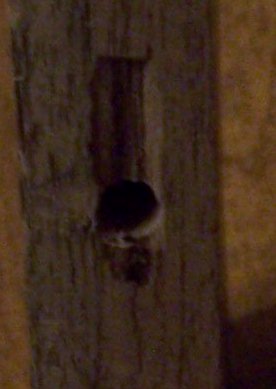
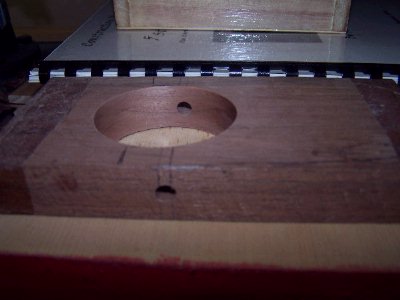
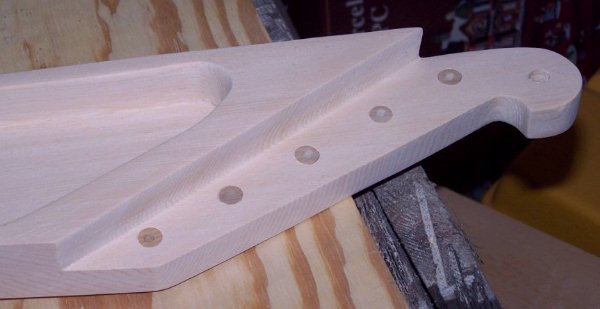
My first job was to drill the hole that forms the beak of the head. I used a nail to mark the position of the hole, "punching" it into the wood so the drill bit would start out "centered" and not wander. I put some waste timber under my wood. Then, using the 3/4" drill, I drilled the hole all the way through.
Phil filed the point off one of the 1" Forstner drill bits for me so it would drill a flat bottomed hole. When you do this, you have to be careful not to damage the cutting part of the bit. While he was busy, I took the tracing I'd made in October and lined it up with the hole I'd just drilled. Then I traced the dotted lines that showed the area I was going to drill out.
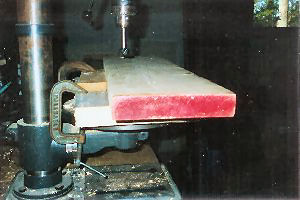
My brother suggested clamping the waste wood to the drill so it wouldn't move and using another small piece of wood as a guide so that, as I drilled from one end of my wood to the other, all I would have to do was slide my piece of wood along the guide and it would be easier to line up the drill bit properly. It was an excellent idea but my husband, Dave, and Phil had to spend several minutes positioning my guide because, when I was tracing, I didn't make sure the longest edge of the kantele was parallel to the edge of the board!

Using the slowest speed setting, as Michael suggests, I proceeded to drill out the back. Because Forstner bits don't have flutes to pass the chips up and to the surface of the wood being drilled, I had to lift the bit out of the bore every 15-30 seconds to clear the bit, and blow away the chips.

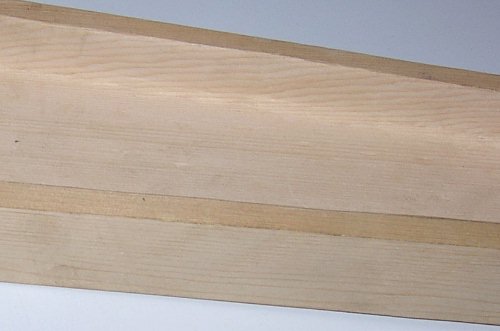
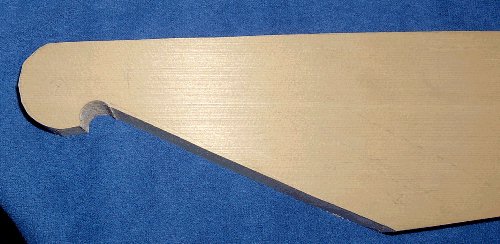
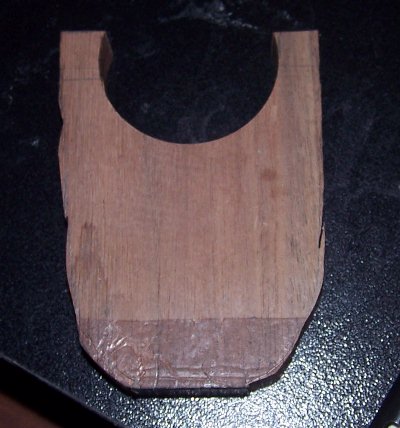
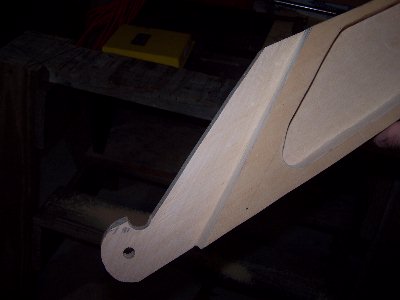
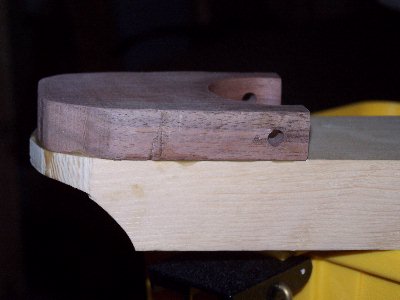
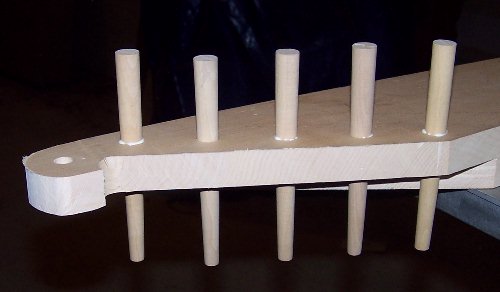
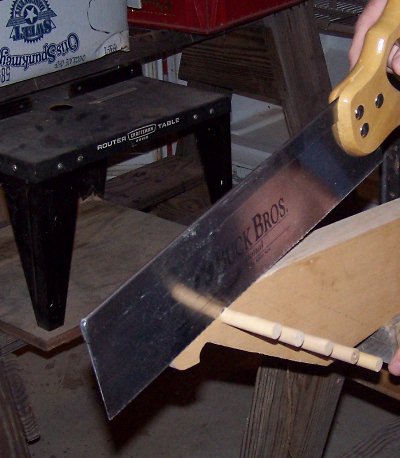
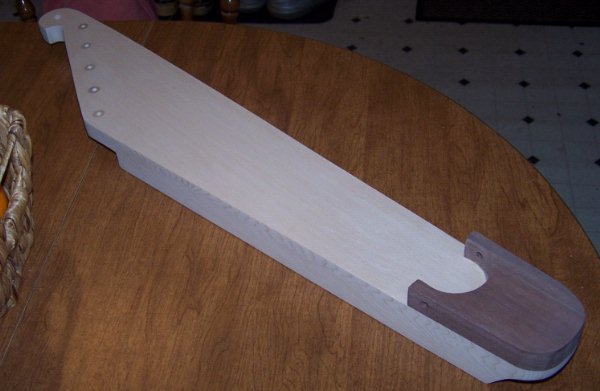
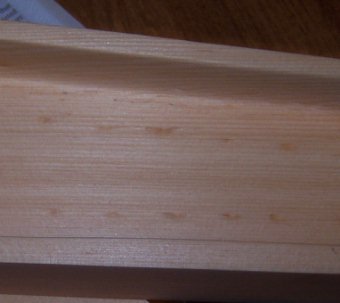
Phil has a table saw, and I took him up on his offer to saw down both the straight edges for me, as it would save me a lot of work. Here's how my kantele looks after sawing.
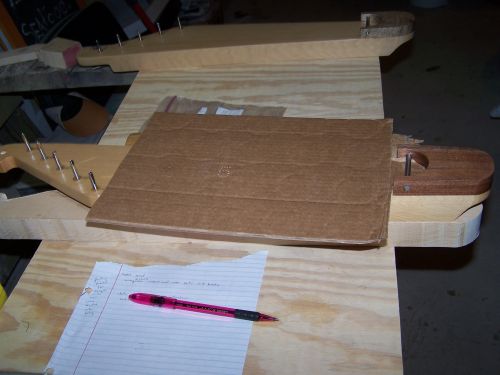
December 5, 2004: This part of the job was the hardest part so far - at least for me! I clamped my wood down on the kitchen table, being careful to place a piece of cardboard between the wood and the clamp for added protection. I put the clamps on upside down which Dave was quick to notice and I only argued with him briefly about the need to turn them around. (They stick up in the air, and you don't have room for your arms to move if you don't turn them around!)
Then, holding the chisel so that the flat side of the blade was facing against the side of the kantele, I began to carefully remove some of the extra wood from the sides. My wood is very hard (or my wrist and arm are incredibly weak). It took a lot of effort to press the chisel into the wood and then remove just a little shaving. I was afraid if I tried to remove too much at once the chisel would slip and gouge the wood, or the wood would split. I managed to avoid those mistakes but, a week later, my right wrist still hurts and my whole arm feels numb! Perhaps I shouldn't have tried to finish the job in one day.
I couldn't use the chisel at all on the ponsi end of the kantele because of the crossgrain in the wood. Dave has a dremel tool and I'm going to see if I can use it to finish straightening out the inside edges before I start to sand.
When I'm through with this, I'm supposed to hollow out the area underneath the bridge "if I wish", Michael says. I'm skeptical of my ability to do this after my experience just trying to remove a few shavings from that end of the kantele, so I wrote to Michael and asked him what would be the consequence if I chose not to do this. Michael wrote back: "Hollowing under the Tailpiece increases the size of the soundboard, which I think is more essential for 10 string Kanteles to avoid having large masses of wood. I would advise not to hollow out under the tailpiece for your first Kantele."
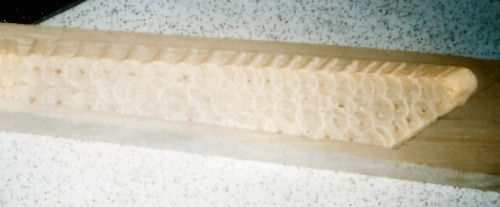
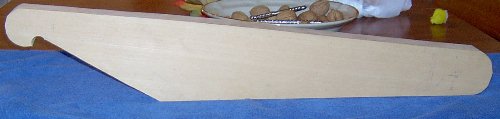
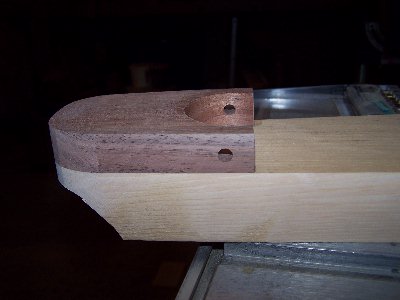
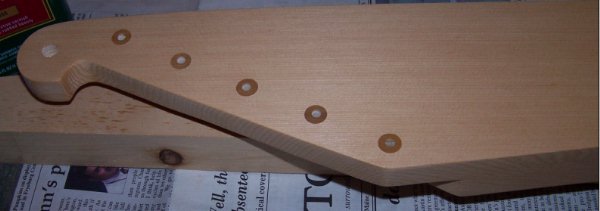
This is how my kantele looks after using my chisel to remove some of the extra wood.
December 12, 2004: Michael wrote..."I was concerned about hearing how your hands were hurting. This can happen if your chisel was not as shiny as a mirror on the angled top and flat bottom. The quick test for sharpness we were taught at cabinet making school was either to check the light reflecting off the blade, or seeing if the blade slips when gently placed on a fingernail or shaving a hair from your arm!
"The importance of keeping your chisel and knives sharp for this is paramount. Check out the "Scary Sharp" method of sharpening your tools (very easy and uses sandpaper, 600 grit silicon carbide followed by a finer grit to get a mirror polish).
"On dense timbers I have often used a mallet when working as you did with the instrument clamped face down. At this stage of the construction, you can use a knife to take more bumps out before sanding.
"With the kantele on your lap on its side and your hands behind the blade, you cut along the sides away from you. By doing this, you are following the grain, and you can remove the excess wood little by little. If you have a vice and a sturdy workbench you can clamp it on its side and use the chisel flat at an angle.
"You might like to make up some sanding sticks, 1" wide wood by 1/2" thick by 3 to 4 inches long. Glue strips of sandpaper on them, starting at 80 grit and 120 grit, then 150 and 180 (very coarse to fine).
"The underside of the soundboard can be scraped to thickness before sanding. Scrapers are very sharp so take care! I have small pieces of steel to do this, (I have used brass and copper, too) but I have discovered that you can buy one sided razor blades that can be quite useful. I often make use of small pieces of broken glass (wrapped carefully in tape with one edge free.) Small pieces of flint, which is a natural glass, (very neolithic!) can be used. Small little shavings should come off. If they are not, you need a new piece or a resharpened piece in the case of the steel pieces."
Michael explained that the chisel should cut like butter. I felt as if I was cutting through stone! I made the mistake of thinking that because I bought a new chisel, it would already be sharp. I didn't know that chisels aren't sold already sharpened! You have to sharpen them yourself!
January 12, 2005: My arm is still healing. Anyway, I'm "on vacation" and won't return to my kantele making until early February when, hopefully, my arm will be better and I'll be ready to tackle the next job!
May 15, 2005: I've had a long break from my work. Unfortunately, my arm doesn't want to heal up any more than it already has...it's a chronic problem I have. I'll have to take it easy and work slow! Today I used the dremel tool to remove bits of wood from underneath and to smooth the inside of my kantele.
June 18, 2005: I worked some more with the dremel tool and with the chisel to remove bits of wood from the underside. I think I might be ready to try some sandpaper, the next time I work. I took some pictures...but they haven't been developed yet.
August 25, 2005: I used the sponge backed sandpaper to smooth the inside and, also, to help remove some of the bumpy bits that I couldn't remove with the chisel. Dave watched me work for awhile, then suggested that I use a cone shaped grinding tool that comes as an attachment for the dremel. You need a light hand to use this attachment and you need to keep the tool constantly moving - or it'll gauge the wood.
October 12, 2005: Today I learned that it's not supposed to take weeks and weeks and weeks to smooth the inside of the kantele. If you're not seeing anything happen (and I wasn't), then it's a sign that you're using the wrong grade of sandpaper. (I was.) Once I switched over to a coarse grade, I started making a lot of progress and it took only two or three sessions to get the inside smoothed down.
November 6, 2005: Even though the inside of my kantele is a lot smoother, it's going to need more sanding. However, I need a break from sanding. I'll go back to it later, but I want to get the rough shape of the kantele cut out first. I'd hoped to use the band saw I bought at a yard sale for $5 this summer to cut out the rough shape of the kantele. However, the saw didn't work properly. I was able to make a few cuts with it, but every time I tried to cut a curve, the band came off. Dave's going to have to look at it but, in the meantime, I've called my brother. He doesn't have a band saw, but says his father in law might. If so, he'll pick it up this week and I can go up to his house to finish sawing the kantele. If at all possible, I'd like to finish my kantele before Christmas.
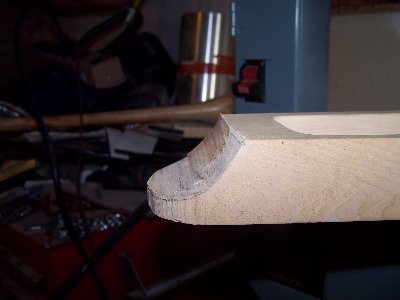
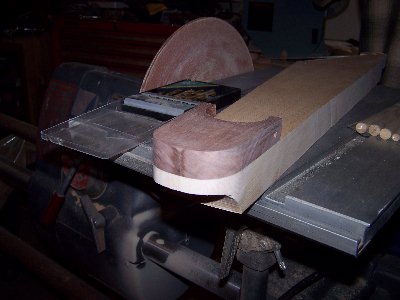
November 16, 2005: To cut out the rough shape of my kantele, I placed the wood down on the table of Phil's band saw, making sure it was really flat. It takes a fair amount of control to do this work with the band saw since you need to move the wood in small increments so that you don't accidently cut off more than you intended - or so that you don't cut the wrong curve. I wasn't able to do this myself, so I asked Dave to help. Patience is needed for this stage of work! The trick to making the curved cut is to take it off in little pieces. Dave kept cutting shallow curves, getting closer and closer to the pencil line. Don't force the saw, or the band might break. One of the consequences of using my $5 saw was that I cut too far in, when making one of my cuts and I had to alter the shape of the curve that forms the "beak" of the head. My kantele won't be turning out exactly as planned but that's OK. The important thing to remember is that "mistakes" are one of the ways you can make your kantele uniquely yours.
Dave cut the curve of the ponsi end using the same technique used for the beak end of my kantele.
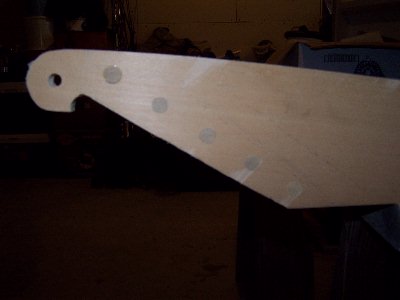
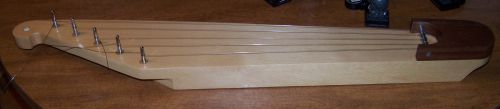
Here's how my kantele looks so far.
November 27, 2005: I wrote to Michael King as follows: "If I understand your directions correctly, I'm going to add the inlay next, then drill the zither pin holes, do the tailpiece and cut the head rebate. Is there a reason why you do things in this order? For instance, why do you drill the zither pin holes before cutting the head rebate (why not after?). Does it matter if you do the tailpiece before or after the head rebate? And I would have guessed that the inlay was one of the last things to do so why do you suggest doing that next? I'm just curious..."
Michael replied: "You have to do the inlay before you glue on the tailpiece as you cannot sand down the soundboard easily later. I sometimes inlay before I drill the holes sometimes after.
The order is a practical one, being far easier to drill into a solid block on the bench drill. This also aids a good clean hole that is essential for zither pins to hold their tuning well.
Are you are going to 'bush' your holes on your kantele? If you are, (and with a softwood I would recommend it) you have to deviate from the order I mentioned.
Instead of drilling out the zither holes full size you just drill a pilot hole..."
I decided not to do an inlay...and I ordered some peg hole bushings from The Fiddle Shop.
December 16, 2005: Michael wrote to say, "...your instrument is coming on very well. You are approaching the only part of making that true accuracy is required, namely the tuning pin and string bar hole on the tailpiece (all the rest is sculpture/art!). Are you using the same wood for your tailpiece? I would use a harder wood myself here - nut Cypress is harder than pine or spruce.
"Thanks for the feedback," I replied. "I will see if I can find some harder wood. Would oak be good to use? What about maple? I don't have the metal bar yet. Can you tell me who or what kind of place sells that - and how do I describe what I want to them?"
"Oak can be stained by contact with steel so it is best not used," Michael wrote back. "Maple is ideal, but so is beech, birch, and cherry..."
February 1, 2006: I searched online for pictures of what different woods would look like. I want the tailpiece to contrast with the body of the kantele and decided I would like to use Koa...until I saw the price. I couldn't find anyone selling the very small size I needed. Companies that were selling it wanted several hundred dollars for a piece of Koa. I decided walnut looked almost as nice. However, when I went to my local Home Depot, I couldn't find anything smaller than a plank so I looked online. Michael suggested Wood Turner's Catalog but their blanks were all an inch or two thick and I needed 3/4" wood. I finally found walnut blanks at Woodworkers.com for $2.99 each. I bought two pieces (in case of a mistake).
Later Michael wrote to say: "I meant to say that the woodturning supply shop sells the stuff oversize, 2" thick bowl blanks and 3" square section can be used, you would also need to drill your holes then recut! But the supplier you found is better for having the right sizes."
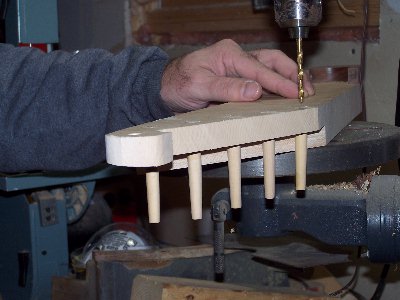
February 12, 2006: My walnut blanks arrived a few days ago. This morning I prepared to drill the zither pin holes. I’d already traced their positions on the wood when I originally traced the outline of the kantele from the plan, but after Michael’s comments about “true accuracy” being required, I decided to double check – just in case I’d been at all careless. However, my holes matched up and Michael’s instructions were so clearly written that I had no problem making these measurements and marking the wood.
In the afternoon, I headed up to my brother’s house to use his bench drill again. I intend to bush the holes, so was only going to drill pilot holes at this stage. Michael suggests drilling 3 mm pilot holes but I’m not using metric drills. The smallest drill bit I had was 7/64” so that’s what I used. Prior to drilling, I positioned the kantele (with some help from my brother) and then clamped it to the drilling table.
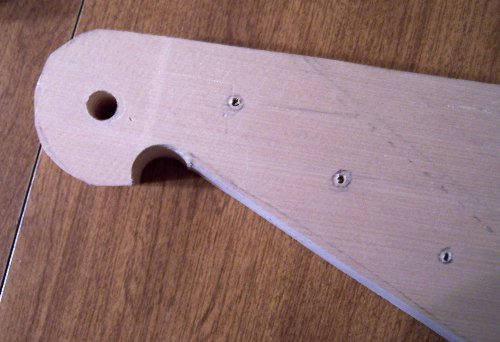
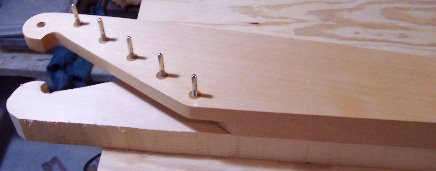
After the pilot holes were drilled, I used a 3/8” drill bit to drill the eye of the bird.
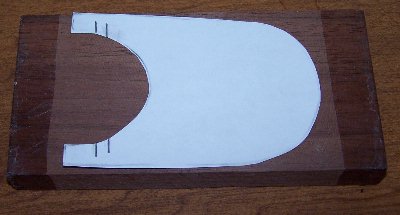
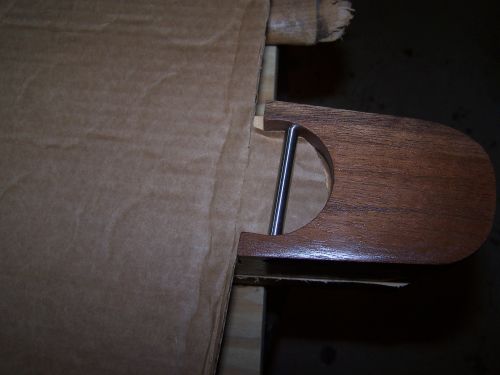
Drilling the hole for the string-bar wasn't easy. Using my template, I tried tracing the shape of the tailpiece onto the block, but the wood was too dark and I couldn't see any pencil lines, so I decided to cut a paper pattern instead, being especially careful to mark the size and position of the hole placement. I thought I could position the paper pattern near the top of the block. That way, if I made a mistake, I could flip the pattern around and have two "go's" with one piece of wood. My brother pointed out that if I did that, I'd have a hard time cutting out the center with the large 2" Forstner bit since only 1/2 the bit would be going through the wood. Instead, he suggested that I position the pattern in the middle of the wood. So I did. I clamped the wood onto the bench drill and, carefully, started drilling with a 1/4" drill bit. The drilling was fairly easy, but when I examined my block I discovered that although the hole was perfectly centered on the side where the drill entered - it was definitely to the right of center on the other end! I was glad I'd bought two blanks.
My brother said the problem was the wood wasn't square to the drill and, using a square, he positioned and braced the wood with scraps of wood and a big clamp.
My second attempt to drill the string-bar hole came out much better - except for the piece of wood that broke off as the drill exited the wood. I'll have to check with Michael to make sure the wood is still useable before I continue.
February 16, 2006: Michael wrote to say that if I'd saved the small piece that broke off, I could re-glue it, using Superglue or Titebond for an invisible repair. Unfortunately, I didn't think to save it. "I can't tell from the picture," he wrote, "but if your piece was slightly oversize, it probably won't matter once it is cut to size."
I told Michael that, unfortunately, I'd noticed that the wood of the kantele itself has warped slightly. I think it must have happened because I had it in an unheated room for several weeks while I was traveling. "Is there anything I can do to unwarp it?" I asked him. "It doesn't sit perfectly flat on the table...but it's not too bad. Is there anything I should be particularly aware of to counteract any problems the warping might cause?"
Michael replied: "Make sure you are keeping the instrument inside your home in-between times while you are drilling the holes. Different humidities will cause the wood to move, but warping will not affect the tone on this instrument, and if it's not too bad will be sorted when you fit the rubber feet at the end. In the worst case you might need to sand the bottom on a flat surface."
November 5, 2006: After another long break, I'm finally back to working on my kantele. I think, this time, I'm going to work until it's done. No more long breaks! I want to hear what it sounds like. I've arranged to spend Sundays at my brother's house until I'm done...and he's going to make his own kantele, too. (He thinks he can whip one out in just a couple of sessions!)
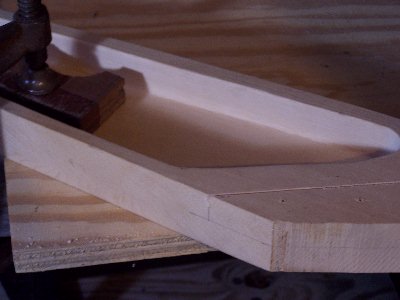
Today I took the paper pattern I made for the tailpiece and traced it onto the wood that I drilled the string-bar hole in. Then I used a large 2" Forstner bit to cut out the center.
When this was done, I used a band saw to cut as much of the extra wood off the curve as I could. It was supposed to give me less to sand but, as you can see, my cut wasn't too smooth. I guess I will be doing a lot of sanding! I was going to do the straight cut across the top, first, but my brother pointed out that if I did that, it would be harder to do the curve cut as there would be less wood to hold onto.
 |
 |
By angling a coping saw, you can cut curves. I started out using a coping saw to saw the undercut of the tail. However, I found it was hard to cut the wood this way, so I quickly changed to the bandsaw to do this work.
I'd hoped to also cut the head rebate during this work session. However, my brother suggested that I get a mitre saw to do this work as it will allow for more accuracy. He's going to pick one up for me this week and I'll cut the head rebate the next time we get together. In the meantime, I'm going to sand the bridge bar hollow and the end of my tailpiece which - for some reason unknown to me - was coated with wax when I purchased it. I will also start sanding the tailpiece although most of the sanding will probably wait until I'm at Phil's. He's got a belt sander that'll make the work go a lot faster. The other job I'll do before seeing him again, is to glue the tailpiece on.
November 12, 2006: I did not glue the tailpiece on before I returned to my brother's house last weekend. Since it would need time to dry once I did so, we decided to cut the head rebate first.
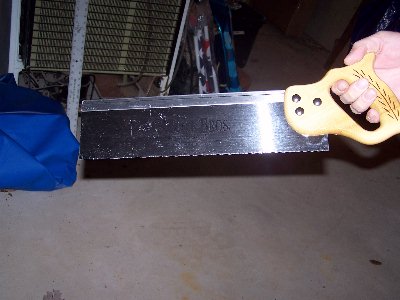
Phil bought a mitre back saw for this work.
We'd already marked the saw lines in pencil when I was up the week before. Now we clamped the kantele face down on a board to make the first cut. We used scrap wood between the kantele and the clamp to protect the instrument. We stopped frequently, while sawing, to clean the sawdust out and to make sure we hadn't cut too deep.
We changed the kantele's position for the second cut.
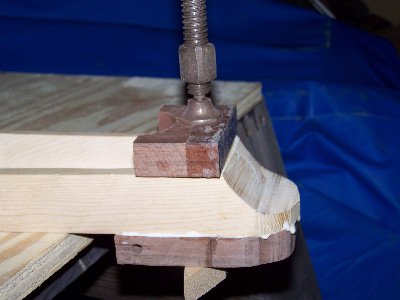
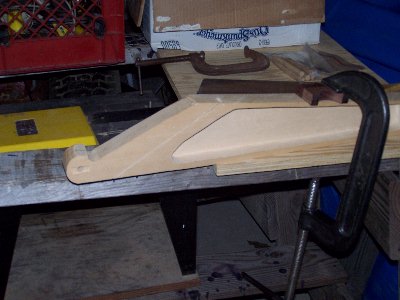
As you can see, there is a lot of glue dripping! I was going to wipe it off, but my brother said that I shouldn't. He said if I wiped it off, it would rub the glue into the grain of the wood. By letting it dry first, I will be able to easily peel the extra glue off and it won't get in the grain.
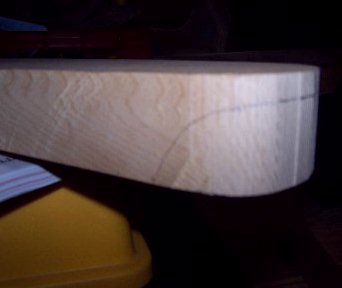
November 19, 2006: One of the things I've learned while making my kantele is that I don't like sanding, so if I can shorten this part of the process, I will. We used a disc sander to smooth all the curves and the outside edges. If you use a disc sander, you need a very light touch. Since I'd never used this piece of equipment before, I practiced with a piece of scrapwood before trying to sand my kantele, and I'm glad I did. You can't leave the sander on the wood for more than a second at a time or it will take off too much wood, leave gauges and flat spots. You also have to remember to keep the kantele flat on the table. Don't angle it! With a little practice, the sander is fairly easy to use and, as you can see from the pictures below, it saves a lot of work.
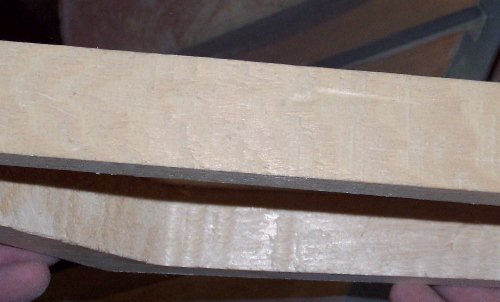
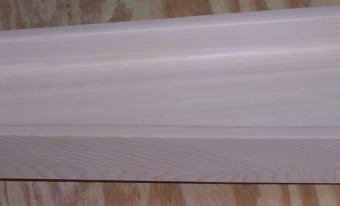
This is what the side of the kantele looked like prior to sanding.
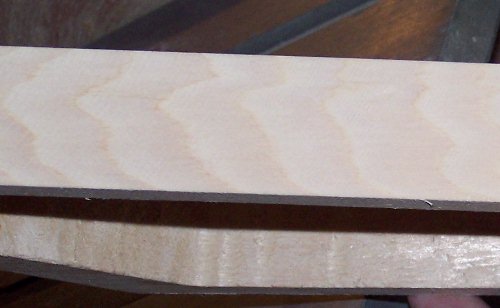
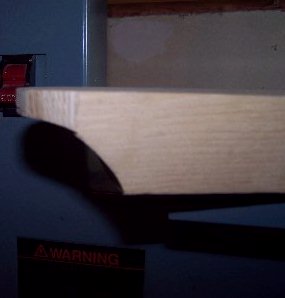
Here it is afterwards.
Important! One of the hardest things for me to remember with the disc sander was to watch my finger position in order to avoid an accident. When you're concentrating on what the sander is doing to your kantele, it's easy to forget where your fingers are. I'm glad my brother was there to serve as a second set of eyes!
Notice the extra wood on the end of the kantele where the tailpiece doesn't match up.
Also, note the gauge where the wood broke off when I drilled the string bar hole.
Sanding removed everything!
I'm not through sanding. The hollowed out part underneath my
kantele still needs a lot more work. However, at this point, I
decided to bush the zither pin holes. I bought six peg hole
bushings from The
Fiddle Shop which saved me some work. We used a 7/16" drill,
to drill out the holes in the kantele. In order to keep the wood
from breaking off when the drill came out of the wood, we drilled
part way through on one side and then turned the kantele over and
finished drilling from the other side.
We then took one of the bushings, rubbed wood glue around the middle and pushed it firmly into place, tapping it once. This was repeated with the other four bushings, making sure that the grain of the bushing followed the same direction as the rest of the kantele.
Since the bushings have to dry before we can go on to the next step, we stopped work.
December 3, 2006:
Phil and I decided to cut the bushings off the top first. We used a mitre back saw for this work. We cut as close to the kantele as we could while trying to avoid scratching the instrument. It really helped to have two sets of eyes watching!
We left the bottom bushings on until after we drilled the holes for the zither pins. That way we didn't have to worry about splitting or splintering the wood while we were drilling.
December 10, 2006:
I spent several days during the past week sanding my kantele. I'm having a problem removing the glue from the bridge bar hollow. I can't seem to reach in with the sandpaper - the space is small. Also, it's hard to sand that area with any control and I keep rubbing against parts of the tailpiece that I don't want to. The rest of the sanding went pretty well. Dare I hope that (except for the bridge bar hollow, my sanding is done? I'll have to show it to Phil and see what he thinks. Unfortunately, we can't get together this week.December 17, 2006:
"I think I'm done sanding my kantele," I told Phil when we got together this week. "What do you think?" He took a look at it and then said, "Let me show you my kantele and then you can decide." One look at his kantele (yes, he is completely caught up to me!) told me that I wasn't anywhere near finished. We spent about an hour and a half sanding our instruments. We used a dremel tool to sand the bridge bar hollow, but we still had a problem removing all of the glue. Afterwards, Phil sent me home with lots of sandpaper so that I can, hopefully, complete the job over the next week. I asked him how many hours he'd spent sanding his instrument (and he says he's not done either) and we calculated that I have at least another five hours of sanding to put into my instrument if I want it to look good.December 31, 2006: I put in a bit more than five hours of sanding over the past two weeks. I concentrated on sanding the hollow part underneath the kantele, the bridge bar hollow and all of the curves although I did do some sanding on the top and sides. However, since we will use an electric sander on those parts when I go to Phil's today, I decided to concentrate on those parts that needed to be sanded by hand. I'm much more pleased with the way it looks now and I can really see a difference between what it looks like now compared to when I thought I was done. After we finished using the electric sander at Phil's, we used a clean brush to wipe off the sawdust.
January 1-5, 2007: I used a clean, lint-free t-shirt to wipe the kantele before applying the finish. You have to make sure all the sawdust is off your kantele, or it will get "glued" to your instrument when you apply the finish. I bought some tung oil which I applied with a clean lint-free rag. You don't have to wait for one side to dry before turning the kantele over and wiping the finish into the other side. However, it does have to dry overnight before you apply a second coat. In between coats, you need to examine the kantele carefully for any little bumps or rough spots. Use fine steel wool to remove the rough spots. I've applied two coats so far. After the second coat I used the steel wool all over the whole kantele. I will apply a third coat later on today. One thing I notice is that little gauges and nicks that seemed hardly noticeable on the hollowed out underside become very noticeable after you apply finish as the oil darkens these spots.
 Before applying finisih |
 After applying the finish
|
January 16, 2007: I ended up applying five coats of tung oil. I gave some thought as to whether I should remove the finish and go back to sanding. Perhaps I could get some of the marks that are showing up out of the wood. However, I decided against it. After all, I'm not trying to make a professional kantele that's good enough to sell. My purpose is to gain a better understanding of what kantelemakers do, and learn something of what's involved in making a kantele. A few knicks aren't going to affect the sound (I don't think) so I will leave well enough alone.
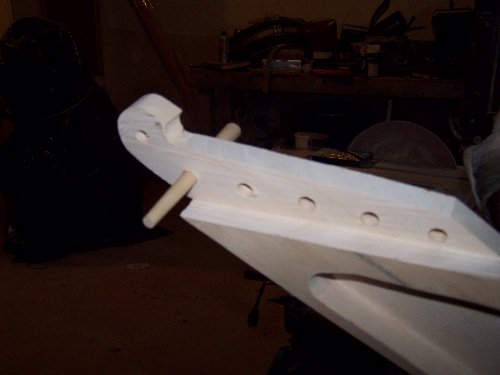
January 22, 2007: I went up to Phil's so we could string our kanteles but, before we did that, we had to insert the zither pins and the metal rod that the strings are tied to. We used a hacksaw to cut the metal rod to size. I was surprised to discover that metal cuts more easily than I thought it would. We then inserted the zither pins, using a block of wood to tap them into place since we didn't have a wooden mallet. We didn't insert the pins all the way through the hole. Instead, we measured the distance from the top of the kantele to the metal rod and then tapped the pins down until the hole in the pins was at the same height as the metal rod. I wondered what would happen if we tapped the pins down too far. It didn't look as if it would be very easy to get the pins out, once they were inserted. Phil pointed out that, if we did insert a pin a little farther than we should have, we could always wrap the string a little higher. We examined several professional kanteles and noticed that pins are not always inserted exactly the same.
After we inserted the zither pins, we prepared our soundingboard guard so that the strings wouldn't scratch the surface of the kantele when we were putting them on.
Phil showed me a trick fishermen use when they make wire leaders for fishing. This really simplified making our strings. First take a six penny nail. Then wrap the tag end of your wire around the nail and take 5-8 twists. Make sure you leave about two inches of wire. Make tight turns and keep the end of the wire parallel to the nail. Hold the twisted wire in one hand and take the loose end in the other hand. Instead of cutting it, spin it around until it breaks off. That way, you won't have any sharp ends.
To attach the string: Insert the string from behind the bar. The string goes under the bar. Hold the loop with one hand and insert the loose end of the string into the loop. Pull the string until it is hand-tight. Now you need to insert the string through the hole of the zither pin. Pull the string tight with a pair of pliers. Wrap the string around the zither pin to secure it. Then, using the tuning key, turn the pin clockwise until the string is tight. Repeat for the other strings.
At this point, we brought the strings up to pitch, using small movements of the tuning peg while plucking the string. We aren't cutting the strings until next week - just in case we discover that we did something wrong.
Listen to the Kantele
This is a recording of me playing the traditional Finnish folk tune, Tottele, on the five string kantele I made.